3D printing has revolutionized the manufacturing industry, providing incredible possibilities for creating intricate objects and prototypes.
At the heart of this technology is a crucial factor in determining the quality and appearance of the final product – the layer height.
Layer height, also known as resolution or detail, is the height of each individual layer of extruded plastic in a 3D print and plays a significant role in the overall outcome.
Table of Contents

Often measured in either millimeters or microns, layer height directly impacts the level of detail and smoothness visible on the surface of a 3D-printed object.
A lower layer height results in more printed layers and increases the print’s detail, while a higher layer height offers faster print times but at the expense of visible layer lines.
As 3D printers continue to advance, understanding the importance of layer height becomes essential for obtaining the best results in any 3D printing project.
Understanding the Concept of Layer Height
Layer height in 3D printing is a crucial aspect that determines the quality and appearance of the final printed object.
It refers to the vertical distance between each layer of material deposited by the 3D printer, which directly affects the print’s overall precision and surface finish.
Layer height is typically measured in microns (µm) or millimeters (mm), representing the increments in which each layer is added during the printing process.
The choice of layer height depends on the desired balance between printing speed and detail level.
Smaller layer height values produce smoother surface finishes as they allow for more layers per millimeter.
However, printing with small layer heights takes longer since more layers need to be added.
In contrast, more significant layer heights result in faster print times but sacrifice some of the model’s fine details.
In general, layer heights can range from 20 µm (0.02 mm) for high-resolution prints to 300 µm (0.3 mm) for rough, lower-resolution prints.
The appropriate layer height for a particular project is influenced by factors such as the 3D printer’s capabilities, the type of material used, and the desired quality of the finished product.
For example, if you are creating a functional part that requires high strength and durability but not necessarily a fine surface finish, a larger layer height may be suitable.
On the other hand, if you are printing a detailed model or sculpture, a smaller layer height will be crucial to achieve the desired level of intricacy.
Finding the perfect layer height for your 3D print is essential to ensure the optimal balance between speed, quality, and material usage.
Experimenting with various layer heights and observing their impact on your prints will help you find the correct specifications and get the best results from your 3D printing endeavors.
Role of Layer Height in 3D Printing
Layer height in 3D printing plays a crucial role in determining the quality, strength, and resolution of the final product.
It refers to the thickness or height of each layer of filament, powder, or resin extruded, sintered, or cured in a 3D printer.
The layer height is measured in millimeters, and selecting the right layer height depends on the desired outcome of the print.
When it comes to print quality and detail, a lower layer height will result in higher-resolution prints.
This is because thin layers enable the 3D printer to capture intricate details more accurately.
For detailed models or parts that require fine features, using a smaller layer height is essential.
As for the print speed, a larger layer height will significantly reduce the printing time.
With thicker layers, fewer passes are required to complete the object, resulting in faster production.
However, this comes at the expense of lower detail and resolution, making it more suitable for less intricate models.
The strength of a 3D print is affected by the layer height as well. Studies and anecdotal evidence have shown that layer height can impact inter-layer bonding within the print.
In general, using a smaller layer height can result in stronger inter-layer bonds, thus improving the overall strength of the print.
Vertical resolution is another critical aspect influenced by layer height. A finer layer height leads to smoother and more consistent surfaces on the vertical walls of the print.
Utilizing finer layer heights will help produce objects with high-quality vertical surfaces.
In conclusion, selecting the appropriate layer height in 3D printing significantly impacts the print quality, detail, speed, strength, and resolution of the final product.
Balancing the various parameters based on the specific requirements for each print will enable optimal results in 3D printing.
The Relation Between Nozzle and Layer Height
In 3D printing, layer height plays a crucial role in determining the resolution and finish of a printed object.
The nozzle diameter, typically found as a 0.4mm nozzle in consumer-grade 3D printers, directly impacts the achievable layer heights.
Understanding the relation between nozzle diameter and layer height helps to achieve the desired printing results.
The layer height simply refers to how tall each layer is in a printed object. It is measured in millimeters and significantly influences the object’s surface finish.
Smaller layer heights produce a better surface finish, while larger ones create a boxier look.
It’s essential to know that the maximum layer height is approximately 75% of the diameter of the nozzle, and the minimum layer height is around 25%.
For instance, with a 0.4mm nozzle, you can utilize a maximum layer height of 0.3mm.
On the other hand, the minimum layer height rests between 12-25% of the nozzle size, typically 0.1mm, but some 3D printers can reach as low as 0.05mm.
Each 3D printer has specifications and limits for nozzle sizes and layer heights.
Therefore, it’s crucial to carefully consult your printer’s user manual and technical specs to ensure the best results.
Regardless, adhering to the general rule of thumb for nozzle diameter and layer height will optimize print quality and ensure success in 3D printing projects.
Material and Layer Height
PLA and Layer Height
PLA (Polylactic Acid) is a popular material for 3D printing due to its ease of use and biodegradability.
Regarding layer height, PLA can be printed with a wide range of heights.
The standard layer heights for PLA are between 0.1mm and 0.4mm, with thinner layers producing finer details and smoother surfaces.
However, remember that printing at lower layer heights will increase print time.
PETG and Layer Height
PETG (Polyethylene Terephthalate Glycol) is another widely used material in 3D printing due to its durability and flexibility.
PETG can be printed with similar layer heights as PLA. However, since it is more prone to stringing and oozing, attention should be paid to temperature and retraction settings.
A layer height between 0.2mm and 0.3mm is often preferred for PETG, balancing detail and print time.
Resin and Layer Height
Resin-based 3D printing, or SLA (Stereolithography), uses photosensitive liquid resin cured layer by layer with a light.
Resin printers can achieve layer heights as low as 0.025mm, offering fine details and smooth surfaces.
Due to the nature of the curing process, layer lines in resin prints are less noticeable compared to FDM (Fused Deposition Modeling) prints.
FDM Materials and Layer Height
FDM 3D printing is the most popular process for hobbyist and professional printers, utilizing various materials such as PLA, ABS, PETG, and TPU.
Layer height in FDM printing depends on the nozzle diameter and material properties.
A typical nozzle diameter is 0.4mm, which allows layer heights between 0.1mm and 0.4mm.
Adjusting layer height according to the material and desired surface finish is an essential consideration in FDM printing.
Filament and Layer Height
Filament diameter in FDM printing is another factor that affects layer height. The most common filament diameters are 1.75mm and 2.85mm.
Thinner filaments allow for better precision, while thicker filaments are more suitable for large prints with more robust layer heights.
Ultimately, the choice of filament diameter and layer height will depend on the requirements of the specific project and the capabilities of the 3D printer being used.
Importance of First Layer Height
The first layer of a 3D print plays a crucial role in determining the success of the entire printing process.
A well-calibrated first layer height ensures proper adhesion to the printing surface, reducing the chances of warping or detachment during the print.
One of the critical factors in achieving a good first layer is the proper calibration and leveling of the print bed.
This process ensures that the distance between the nozzle and the printing surface is consistent, allowing for an even and accurate filament deposition.
Proper bed leveling can help reduce the risk of print failures, improve the overall print quality, and save time in post-processing.
Another factor that contributes to the successful printing of the first layer is the choice of printing surface.
A surface with adequate adhesion properties helps the first layer stick well and stay in place as subsequent layers are added.
Some joint printing surfaces include glass, PEI sheets, and removable build plates.
It is essential to find a surface compatible with the specific filament being used and to maintain it properly, including regular cleaning and application of adhesives, if necessary.
To sum up, the importance of first layer height in 3D printing cannot be overstated.
Proper calibration, leveling, and printing surface selection all contribute to the successful adhesion and quality of the first layer, which in turn sets a solid foundation for the rest of the print.
By carefully considering these factors, one can significantly improve the likelihood of a successful and high-quality 3D printing experience.
Interrelation of Layer Height and Print Time
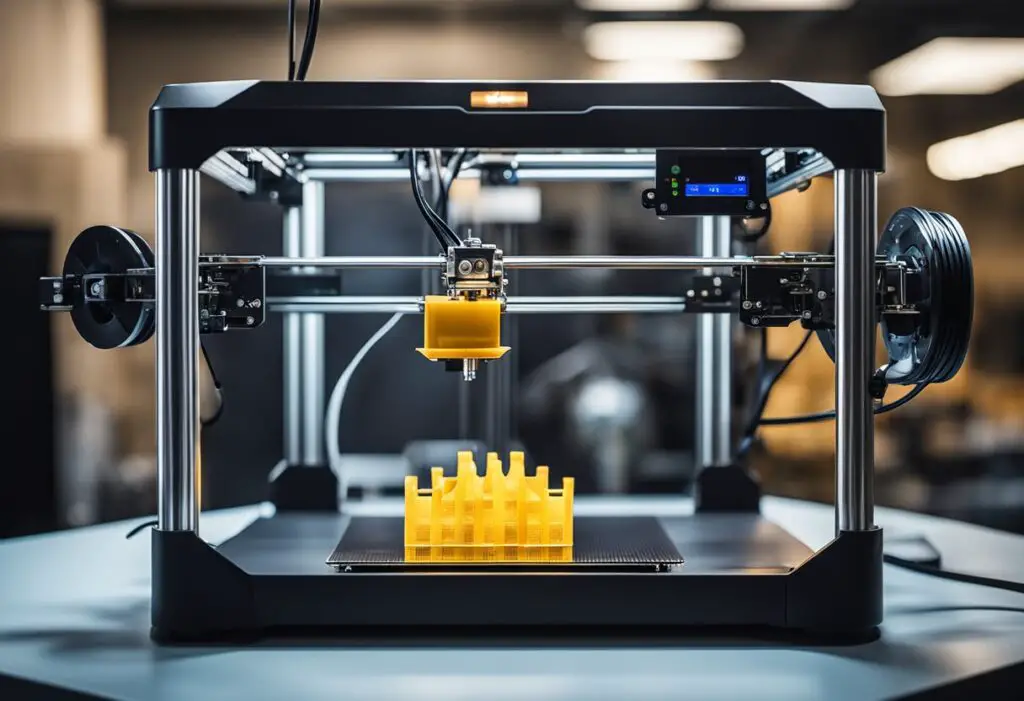
In 3D printing, the layer height plays a significant role in determining the print time.
A smaller layer height means finer detail in the printed object, but it also increases the number of layers needed to complete the print.
More layers translate to a longer printing time as the printer needs to deposit material for each layer and move the head up between layers before continuing to print.
On the other hand, a larger layer height allows for reduced print times because the printer deposits thicker layers of material, thus requiring fewer layers to complete the object.
However, this also results in a lower resolution print, as the layer lines become more noticeable and details may be lost.
The printing speed, or layer speed, is another factor that influences the print time.
Faster speeds mean the printer can complete a layer more quickly, but this may come at the expense of potentially compromising print accuracy and quality.
The tradeoff between print speed and layer height is a delicate balance that must be considered by users based on their specific needs and expectations.
In summary, layer height and print speed are interconnected factors that affect the overall print time in 3D printing.
Choosing a smaller layer height will result in a higher-resolution print. Still, it may take considerably longer, while opting for a more considerable layer height will decrease print times but possibly sacrifice some detail.
Additionally, adjusting print speed requires careful consideration to ensure satisfactory results and maintain print quality.
Finding the optimal balance between these elements ultimately depends on the user’s priorities and the desired result for the 3D-printed object.
Layer Height and Slicing Software
Layer height in 3D printing refers to the thickness or height of each layer of filament, powder, or resin extruded, sintered, or cured in a 3D printer.
It plays a significant role in determining the print quality, resolution, and printing time.
Slicing software is an essential tool in 3D printing, helping to convert a digital 3D model into a set of instructions that the 3D printer can understand.
Among the popular slicing software options are Cura, Slic3r, and PrusaSlicer.
Cura and Layer Height
Cura is a widely used open-source slicing software developed by Ultimaker.
It allows users to adjust settings, including layer height, to achieve the desired print quality, precision, and speed.
The software calculates the optimal printing path and generates the G-code, which guides the movement of the 3D printer during the printing process.
In Cura, users can easily change the layer height setting by entering a value in the “Layer Height” field.
Smaller layer heights will result in smoother and more detailed prints, while larger layer heights will lead to faster print times but can compromise the print quality and appearance.
Cura also provides different profiles with pre-configured layer height settings, such as “Fine” (0.1mm), “Normal” (0.15mm), and “Coarse” (0.3mm), for users to choose based on their needs.
Advanced users can further customize their print settings for optimized results.
Measuring layer height in microns allows for more precise control in 3D printing.
Typically, layer heights range from 50 to 400 microns, with 100 microns being a standard setting for FDM printers.
As the layer height decreases, the print quality increases, as does the printing time.
In conclusion, layer height is an essential parameter in 3D printing, directly affecting print quality, resolution, and time.
Slicing software such as Cura allows users to adjust layer height settings easily and select or create custom profiles for optimal results.
Role of Stepper Motors and Layer Height
Stepper motors play a crucial role in determining layer height in 3D printing.
The motors control the movements of the printer’s extruder, and their precision directly affects the quality of the printed object.
They operate in increments known as steps, and each step corresponds to a specific angle of revolution.
The step distance, or how far the extruder moves during each step, is an essential factor in achieving the desired layer height.
To increase precision, stepper motors can operate in half steps, where each movement is half the distance of a full step.
This enhances the accuracy of the print and helps in achieving finer layer heights.
Threaded rods, commonly found in the Z-axis of a 3D printer, are integral to the movement of the extruder.
The rods’ design, pitch, and diameter impact the step distance and, in turn, the layer height.
The interaction between stepper motors and threaded rods allows the printer to produce layers with varying heights depending on the desired print quality.
In summary, stepper motors and their components, such as step distance and half steps, work together with threaded rods to achieve the desired layer height in 3D printing.
The stepper motor’s precision is critical for creating quality prints, and understanding the relationship between these elements can help users optimize their 3D printing projects.
Comparing Layer Heights Through Benchy

3D Benchy is a popular benchmark model in the world of 3D printing. It’s a small, detailed boat designed to test the performance and capabilities of a 3D printer.
By comparing the print quality of Benchy models at different layer heights, we can better understand the impact of layer height on the overall print quality.
Layer height is significant in determining the level of detail in a 3D print.
A smaller layer height, such as 0.1mm, will yield a more detailed print, but it will also take longer to print and may be more prone to printing errors.
On the other hand, a larger layer height, such as 0.3mm, may produce a faster print but with a lower level of detail.
When printing a Benchy model, it’s essential to consider the trade-offs between print quality and speed.
Let’s compare two Benchy models printed at different layer heights:
- Benchy printed at 0.1mm layer height: This Benchy will take longer to print, but the higher level of detail is evident in the smooth surfaces and crisp edges. It showcases the 3D printer’s ability to reproduce fine details.
- Benchy printed at 0.3mm layer height: This Benchy will print much faster, but the lower level of detail is apparent in the visible layer lines and less defined edges. This print demonstrates how a larger layer height can still produce a recognizable model, albeit with a coarser appearance.
In conclusion, examining Benchy models at various layer heights provides valuable insight into the trade-offs between print speed and detail in 3D printing.
By comparing these models, users can better understand their printer’s capabilities and choose the optimal layer height for their particular printing needs.
Optimizing Layer Height for Quality and Strength
Finding the Sweet Spot for Layer Height
In 3D printing, layer height plays an essential role in determining the quality and strength of the final printed object.
The sweet spot for layer height is typically found between 25% and 75% of the nozzle diameter, as this range optimizes both detail accuracy and resolution.
For instance, when using a 0.4mm nozzle, you can set the layer height between 0.1mm and 0.3mm.
Each printer model may have its specific sweet spot, which can be determined through experimentation and calibration.
Pay close attention to the right balance between print quality and speed.
While lower layer heights will increase print quality and smoothness, they will also require more time to complete the print.
On the other hand, higher layer heights will reduce printing time but may lead to visible imperfections in the finalized object.
Layer Adhesion and Strength
Layer height is also an important factor when considering the adhesion between each layer of your 3D print, which affects overall print strength.
A proper layer height will promote strong bonding between layers and prevent print imperfections, such as gaps or uneven coverage.
Layer adhesion can be improved by fine-tuning the temperature settings of your 3D printer, ensuring a clean and leveled print bed, and using a tested filament that works well with your specific printer.
Keep in mind that different materials may require adjustments in layer height settings.
For example, experimenting with various layer heights for PLA and PETG may yield different results in terms of strength and detail.
In summary, optimizing layer height is crucial for achieving both quality and strength in your 3D-printed objects.
Take the time to experiment with your printer, filament, and settings to find the ideal balance between layer height, print quality, smoothness, and strength.
The Aesthetics and Limitations of Different Layer Heights
In 3D printing, layer height plays a significant role in determining the quality and appearance of the final printed object.
Layer height refers to the thickness or height of each layer of filament, powder, or resin extruded, sintered, or cured by a 3D printer and is typically measured in millimeters or microns.
Adjusting layer height can directly impact the aesthetics, print time, and limitations of the 3D print.
Smaller layer heights, often between 0.1 and 0.2 millimeters, result in a better surface finish, giving the printed object a smoother texture.
This is particularly noticeable in parts with curves and angles, where smaller layers create a more accurate representation of the intended geometry.
However, printing at smaller layer heights comes with a few drawbacks. Smaller layers require more layers per millimeter, resulting in longer print times.
In comparison, larger layer heights, usually above 0.2 millimeters, provide a rougher surface finish with a more box-like quality.
These higher layer heights are suitable for less complex or less detailed prints, as they reduce print time but decrease the accuracy of curves and angles.
Moreover, layer height can also affect the strength of the final print, with some studies suggesting that using larger layer heights may lead to increased strength in certain materials.
This is attributed to more extensive layers having better layer adhesion, ensuring a more robust print.
In conclusion, when selecting layer heights for 3D printing projects, it’s crucial to consider the desired aesthetics, print time, and limitations of the final product.
Balancing higher detail with practical printing times is an essential skill to master for anyone using 3D printing technology.
3D Printing Mistakes Related to Layer Height
Layer height in 3D printing refers to the thickness of each layer that makes up a printed object.
Choosing an appropriate layer height is crucial for achieving the desired balance between print speed and quality.
However, there are several common mistakes related to layer height that could lead to poor print outcomes.
One common issue is selecting a layer height unsuitable for the nozzle size or printer capabilities.
Most 3D printers have a 0.4 mm diameter nozzle, with layer heights commonly between 0.1 mm and 0.4 mm.
Using a layer height too small for the nozzle size can result in poor print quality while using a layer height too large can lead to incomplete prints or loss of detail.
Another mistake is printing at an excessively low layer height, which can increase printing time without significantly improving print quality.
While smaller layers create a smoother surface, the trade-off is that the print takes much longer to finish.
It’s essential to find the right balance between layer height and print speed for an efficient and high-quality print.
Additionally, it’s crucial to ensure that your 3D printer’s settings are appropriately calibrated.
Miscalibrated printer settings, including layer height and micro-stepping, can lead to print errors or inconsistencies.
Regularly calibrating your 3D printer and double-checking the settings can significantly reduce the risk of layer height-related issues.
To avoid these mistakes and achieve optimal print results, you must be well-versed in your 3D printer’s capabilities, choose the appropriate layer height for your project, and consistently monitor and calibrate your printer settings.
By doing so, you can produce high-quality 3D prints while minimizing printing time and material waste.
Layer Height in Prototyping and Manufacturing
Layer height is an essential factor in 3D printing, as it determines the vertical resolution of a printed object.
It refers to the thickness of each consecutive layer during the prototyping and manufacturing process, using microns as the unit of measurement, where one micron equals 0.001mm.
The significance of layer height varies in different applications, such as prototyping and manufacturing.
In prototyping, designers often prioritize detail and surface finish to produce visually accurate 3D models.
Therefore, smaller layer heights are preferred for better surface finish and resolution.
On the other hand, in manufacturing applications where strength and durability are essential, a larger layer height may be suitable to create parts with thicker layers, speeding up the production process without compromising functionality.
Understanding the balance between layer height and print speed is vital for time-sensitive applications.
Smaller layer heights will increase the layers required, resulting in a longer print time.
However, larger layer heights would reduce printing time but may compromise the surface finish of the printed object.
Thus, it’s crucial to choose the appropriate layer height according to the end-use requirements while considering the printing speed.
In conclusion, layer height plays a significant role in determining the surface finish and overall quality of a 3D-printed object.
Both prototyping and manufacturing applications require careful consideration of layer height to balance surface finish, resolution, and print speed.
Recognizing the importance of layer height will allow designers and manufacturers to make informed decisions when using 3D printing technology for varying purposes.
Tips for Managing Layer Height in 3D Printing
In 3D printing, layer height plays a crucial role in determining the quality of your final print.
To achieve the best results, it’s essential to understand how layer height affects print speed, detail, and strength.
One of the key factors in determining the optimal layer height is the geometry and design of your 3D model.
If your model has many fine details, using a smaller layer height will result in a higher level of detail in your print.
However, keep in mind that smaller layer heights mean the print will take longer to complete.
Print temperature is another factor that affects layer height. Proper temperature settings ensure better adhesion between layers, producing a more robust final product.
Experiment with the temperature settings on your 3D printer to find the ideal balance between layer height and good adhesion.
As you explore different layer heights, it’s essential to strike a balance between appearance and functionality.
While thinner layers offer better detail resolution, a larger layer height may be better suited for more functional prints that need to withstand wear and tear.
Finally, post-processing your 3D print can also help refine the appearance of layers and enhance detail.
Techniques such as sanding, priming, and painting can help hide layer lines and make the printed object look smoother.
In conclusion, understanding the importance of layer height and temperature settings in 3D printing can help you optimize your printing process for the best results.
Incorporate these tips into your workflow to achieve prints with the desired balance between detail, strength, and print speed.

