3D printing, also known as additive manufacturing, has revolutionized the world of rapid prototyping, allowing individuals and businesses to bring their ideas to life quickly and efficiently.
One of the key aspects of successfully utilizing 3D printing technology is designing objects that are suitable for printing.
This article will explore the steps involved in creating 3D printable objects and provide helpful tips for designing your very own creations.
Table of Contents

Before diving into designing objects for 3D printing, it’s essential to understand the fundamentals of how a 3D printer works.
In essence, 3D printers create objects by building up layers of material one at a time. This process requires a precise digital model created using specialized design software, such as CAD programs or Tinkercad.
Familiarizing yourself with these tools will help improve your design skills and ensure your object prints accurately.
With a firm grasp on the principles of 3D printing and an understanding of how to use design software, you’re ready to start creating objects for 3D printing.
In the following sections, we will discuss everything from the initial concept phase to adjusting and optimizing your design for the best possible print results.
So, let’s dive into the world of 3D printing design and embark on a journey to turn your creative ideas into tangible, functional, and attractive objects.
Does 3D Printing Require Software to Create the Design of the Object?
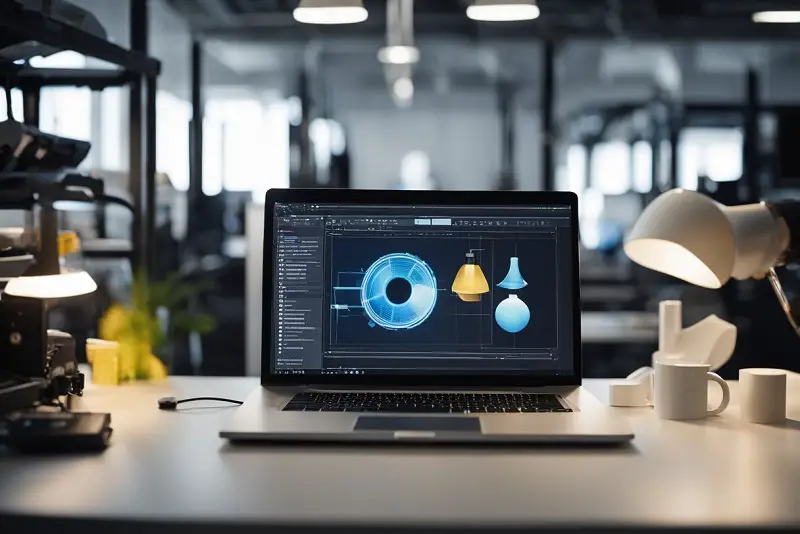
Yes, 3D printing requires software to create the design of the object. This software is known as Computer-Aided Design (CAD) and is essential in the 3D printing process.
CAD software helps develop a digital 3D model, translated into data that the 3D printer can understand and use to create the physical object.
Various CAD software options are available, catering to different skill levels and purposes.
Beginners can start with free or entry-level CAD software like TinkerCAD, while professional designers might choose more advanced tools such as AutoCAD, SolidWorks, or Blender.
When creating an object for 3D printing, it is crucial to consider factors like size, strength, and the print material. Properly designing an object with these factors in mind ensures a successful and efficient 3D printing process.
Other considerations include overhangs, wall thickness, and infill patterns, which all contribute to the printed object’s structural integrity and final appearance.
While CAD software plays a crucial role in designing 3D objects, additional software called slicers is also required. Slicers work by converting the 3D model into G-code, which the printer uses to determine the movements and material extrusion.
Some popular slicer options include Cura, Simplify3D, and PrusaSlicer.
In summary, designing objects for 3D printing involves utilizing CAD software to create a digital model, considering factors like size, strength, and material, and using slicer software to translate the design into printable G-code.
By understanding these requirements and steps, individuals can successfully design objects for the 3D printing process.
What software is used for 3D printing?
When it comes to 3D printing, various software tools are available to create and design your models. Choosing the right program depends on your project requirements and your skill level.
One popular option is Blender, a free, open-source 3D model creation software suitable for beginners and professionals alike.
Blender offers a range of features for modeling, animation, and rendering, making it a versatile choice for many projects.
For beginners or those wanting an easy-to-use 3D printing software, TinkerCAD is an excellent choice.
This free, browser-based tool is perfect for kids and beginners, allowing users to create simple designs without complex software installation.
Advanced users in the industrial and engineering fields can opt for Siemens NX, which enables users to design and create advanced 3D models. At the same time, Solidworks is another robust option for professional parts designing.
Catia is another advanced design software widely used in the automotive, aerospace, and industrial equipment industries for creating complex surfaces and engineering systems.
Finally, for slicing and preparing your 3D model for printing, UltiMaker Cura is a free, open-source option that is both easy to use and highly customizable, catering to users of all experience levels.
In summary, choosing the appropriate software for your 3D printing needs requires considering your skills, project requirements, and personal preferences.
The above options are just a glimpse of what’s available, ensuring a suitable tool for everyone.
How do you make a 3D model suitable for 3D printing?
When designing a 3D model for printing, it’s essential to consider the 3D printing technology that will be used. Technologies like Fused Deposition Modeling (FDM) and Stereolithography (SLA) require different design approaches.
For example, FDM printers demand more attention to overhangs and supports while SLA printers rely on the orientation and resin drainage points.
Creating a suitable model for 3D printing often starts with choosing the right software. TinkerCAD is a popular choice for beginners as it’s free and entirely browser-based, requiring no installation.
More experienced users seeking advanced features can opt for Fusion 360 CAD – a versatile Computer-Aided Design software that allows for detailed modeling and customization.
When designing your model, closely examine wall thickness and structural integrity. Thin walls may not print correctly, while heavy, solid objects may consume excessive material.
Always create a consistent and appropriate wall thickness that can withstand printing.
Keep in mind that 3D printers have specific limitations and tolerances.
Clearances between moving parts, text, and other details should be adjusted to match the printer’s capabilities. This helps avoid fusing or interference between components and ensures a successful print.
Lastly, export the 3D model in a suitable file format, such as STL. This format is universally accepted by most 3D printers and slicing software and ensures accurate print results.
Before sending the model to the printer, double-check for errors by previewing it in slicing software, making necessary adjustments, and re-exporting if needed.
By following these steps and considering the design limitations and requirements of the chosen 3D printing technology, you can create a model that is both suitable and optimized for the 3D printing process.
How to Make 3D Models from 2D Drawings?
Designing 3D objects from 2D drawings can be an exciting and useful process for 3D printing. There are a few essential steps to follow in order to create 3D models from 2D sketches successfully.
First, start by converting your 2D drawing or sketch into a digital format. If you have hand-drawn sketches, you can scan or take a high-resolution photo and import it into your computer.
Alternatively, you can create digital 2D drawings using design software like Adobe Illustrator or Corel Draw.
Once you have your digital 2D artwork, the next step is to import it into a 3D modeling software. Some popular choices include Tinkercad, Autodesk Fusion 360, or SketchUp.
These programs allow you to quickly turn 2D drawings into 3D models by extruding, scaling, and manipulating the imported 2D sketch.
- Extruding: This fundamental modeling technique extends a 2D shape into the third dimension. In most 3D modeling software, extrusion tools will enable you to turn your 2D drawing into a 3D shape by stretching it along the Z-axis.
- Scaling: After extrusion, you might need to adjust the size of your 3D object to match desired dimensions. Scaling tools in 3D modeling software allow you to increase or decrease the size of your object proportionally.
- Manipulating: Finally, use the various editing tools in your chosen software to manage your model’s geometry and smooth edges and add necessary details.
Throughout the process, always ensure to adhere to the guidelines and limits of your 3D printer, considering factors such as wall thickness, overhangs, and support structures.
When your 3D model is complete, export it in a compatible file format for your 3D printer, such as STL or OBJ.
By following these steps and leveraging user-friendly 3D modeling software, anyone can turn their 2D drawings into impressive 3D printed objects.
Remember to be patient; mastering the skills may take some practice and experimentation.
Can you make a 3D print from a picture?
Absolutely! Turning a picture into a 3D print is possible, and you have several effective solutions available to help you achieve this.
With the right tools, you can transform your favorite photos into 3D models, ready for printing.
One popular method is to use a web application like ItsLitho. Simply insert your JPG or PNG file into a slicer like Cura, and the app will create a 3D printable file that you can adjust and modify.
This lends an extra dimension to your photos, giving them a unique touch.
Another approach is to utilize 3D modeling software, such as Tinkercad, which is beginner-friendly and trusted by millions of people.
With this software, you can customize your models and avatars, allowing you to bring your pictures to life. You may even delve into more advanced software options for more complex designs as your skills develop.
Remember, the final 3D print quality and appearance depend on the source image’s quality and resolution. Therefore, working with high-quality photos is crucial to ensure the best 3D print results.
With some practice and creativity, you’ll soon be transforming your pictures into impressive 3D-printed objects!
Creating a 3D Model for Printing

Designing With Software
There are various software programs available for designing 3D models for printing. Some popular choices include Blender and SketchUp.
Both free and paid alternatives exist, allowing users at different skill levels to create models that can be used for FDM printing and other manufacturing processes.
Essential Factors in 3D Design
To ensure the success of your 3D-printed model, consider the following factors:
- Geometric Constraints: When designing, ensure the model is watertight, which means there are no holes, and each surface intersects with another surface along a well-defined edge.
- Wall Thickness: Opt for an appropriate wall thickness to maintain the model’s strength while avoiding issues with uneven extrusion or insufficient support.
- Overhangs: Remember that overhang angles beyond 45 degrees may require support during printing. Design your model to minimize extreme overhangs and save time and material during printing.
Preparing Your Model for 3D Printing
Once your 3D design is complete, you must export it as an STL file, the industry-standard format for 3D printing. Websites like Thingiverse allow users to share and download STL files.
After exporting your model, use a slicer program to convert it into instructions for the 3D printer.
The slicer will determine the optimal layer height, nozzle temperature, and other settings to deliver the best print quality and strength.
Don’t forget to pay attention to the layer line direction, as this affects the print’s strength.
By keeping these factors in mind and using the right software and design principles, you can create successful 3D models for printing.
Enjoy exploring the world of 3D design and bring your ideas to life!
How to Design Objects for 3D Printing: The Essentials

When beginning your journey into 3D printing, it’s essential to understand the basics of designing a 3D object.
One of the first steps is to choose suitable Computer-Aided Design (CAD) software.
Many beginners opt for TinkerCAD or SketchUp, while experienced designers lean towards Fusion 360 or Blender for more complex models.
Learning and mastering your chosen software is crucial for streamlined design work regardless of the tool.
Next, visualize your project and create a sketch or drawing to reference your model. This will help you establish the design’s dimensions and proportions, reducing the risk of errors during the 3D modeling process.
Import your drawings or sketches into the CAD software as a starting point.
Optimizing your model is vital to ensure a successful 3D print. This means paying close attention to aspects like walls, overhangs, and supports.
Thicker walls provide more stability but increase material use and print time. Overhangs may require support structures, which add complexity and must be precisely placed to avoid print failure.
Material selection also plays a significant role in the design process. Choose a material compatible with your printer and your final object’s desired application.
Please familiarize yourself with the specifics of the material, like its strength, flexibility, and print temperature requirements, to make informed decisions during model design.
By keeping these essential aspects in mind, designing objects for 3D printing becomes less daunting, and the results are more likely to meet your targeted expectations.
Happy designing!


