3D printing has revolutionized how we create and manufacture objects, allowing for intricate and complex designs to come to life.
One of the essential tools in this process is CAD (Computer-Aided Design) software, which allows users to design and model objects in a digital space before printing them out in the physical world.
Table of Contents
Learning the basics of CAD for 3D printing can be an exciting and rewarding journey.
With a wide array of online tutorials, courses, and resources available, aspiring CAD designers can quickly grasp the fundamentals and begin creating their own custom 3D-printed objects.
By investing time and effort in learning the basics, you’ll soon be able to turn your ideas into tangible products that showcase your creativity and skill.
Understanding CAD and 3D Printing
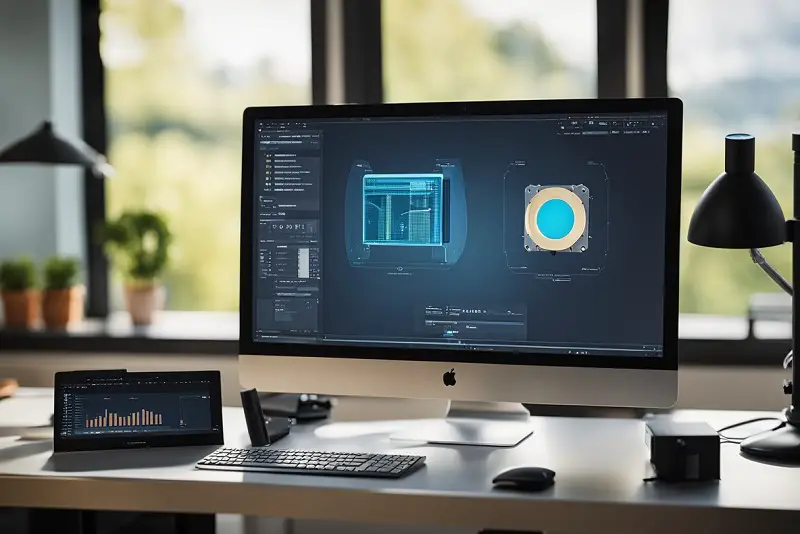
The world of 3D printing is an exciting frontier for engineers, designers, and hobbyists alike.
At the core of this technology is Computer-Aided Design (CAD) software, which allows creators to develop 3D models that can later be printed using a 3D printer.
CAD software plays a crucial role in 3D printing, allowing users to create and edit complex geometries and shapes.
These designs can then be exported as STL files, the standard file format understood by 3D printers. This export process essentially “slices” the 3D model into layers the 3D printer can understand and build upon one at a time.
There are many different CAD software options available on the market, each with its unique features and benefits. Some popular choices include AutoCAD, SolidWorks, and Fusion 360, which cater to different skill levels and industries.
Regardless of the software chosen, becoming familiar with the interface and tools provided to create accurate and reliable 3D-printed components is essential.
In the process of 3D modeling, users can define their design’s dimensions, materials, and tolerances.
This level of detail allows engineers to produce prototypes, products, and components that are fit for purpose, functional, and compatible with other parts. It is crucial to consider these factors when designing elements for 3D printing.
When operating a 3D printer, understanding the machine’s capabilities is essential. Printers come in different sizes, materials, and technologies, each with unique advantages and limitations.
It is crucial to choose the right 3D printer for the intended application, whether small-scale prototyping or large-scale production.
In conclusion, mastering CAD software and understanding the capabilities of 3D printers are essential factors in successfully creating 3D-printed components.
By honing these skills and staying curious, engineers and designers can effectively explore the limitless potential of 3D printing technology.
Starting with Tinkercad
Tinkercad is a popular and user-friendly web-based application that beginners can use to learn computer-aided design (CAD) for 3D printing.
Its simple interface and intuitive tools make it an ideal choice for students and those new to 3D modeling. With a vast library of tutorials, users can quickly learn the basics of creating and manipulating 3D objects.
One of the best ways to start learning Tinkercad is through their official website, which offers a variety of tutorials aimed at different skill levels.
These tutorials cover crucial topics, such as designing and printing in 3D, coding, and creating circuits. As users gain confidence in their skills, they can move on to more advanced tutorials and attempt more complex projects.
For students who prefer a more structured learning environment, there are also online courses that offer comprehensive instruction on using Tinkercad.
These courses typically provide video lessons, interactive exercises, and quizzes to help reinforce the concepts and skills learned.
By participating in an online course, learners can benefit from instructor guidance and the opportunity to engage with a community of other students.
In addition to tutorials and courses, numerous blogs, forums, and resources are available online that can further support learning Tinkercad.
These resources often provide valuable tips, troubleshooting guides, and inspiration for new projects.
By regularly engaging with these resources, users can expand their knowledge base and continue to develop their skills in 3D modeling and 3D printing using Tinkercad.
Overall, Tinkercad provides an accessible and enjoyable way for students to learn CAD for 3D printing.
With its diverse array of tutorials, courses, and resources, learners can gain a solid foundation in CAD and begin creating their 3D designs in no time.
Transition to Fusion 360
Fusion 360 is an innovative CAD software increasingly popular among designers for 3D printing applications.
This modern tool brings a user-friendly approach to creating complex 3D designs and makes learning easy for individuals interested in science and research.
One of the most significant benefits of transitioning to Fusion 360 is its ability to create organic shapes easily.
The software offers a powerful suite of tools that facilitate the creation of complex and intricate geometry that was previously hard to achieve with traditional CAD software.
Designers can bring their ideas to life by easily manipulating layers and developing highly detailed 3D models.
Collaboration is a key strength of Fusion 360, as it allows designers to collaborate on projects and share files seamlessly.
This feature is handy for design teams working on research projects where ease of communication is essential.
By using the cloud-based platform, team members can access the latest version of the design, reducing the potential for errors and enhancing overall productivity.
Another exciting aspect of Fusion 360 is its ability to support top-notch 3D printing technologies.
The software has an integrated slicing tool, enabling designers to transition from digital modeling to physical prototypes quickly.
This makes it an ideal choice for those looking to develop intricate 3D models in various materials, from plastics to metals and even ceramics.
As you can see, Fusion 360 is a powerful and versatile CAD software that offers many advantages to designers, particularly those in science and research.
Its user-friendly interface, sophisticated design capabilities, and seamless collaboration features make it an ideal choice for anyone looking to create detailed and functional 3D-printed designs.
Advanced Skills with Autodesk Fusion 360
Autodesk Fusion 360 is a highly regarded CAD software known for its flexibility in handling intricate designs for 3D printing.
This powerful tool simplifies the learning process for beginners, but it also offers a range of advanced features for experienced users who want to tackle complex projects.
One significant aspect of the software is the assembly feature, which allows users to effortlessly construct intricate designs by joining multiple components.
By combining various parts, you can create a well-orchestrated prototype ready for printing.
A common challenge in 3D printing is warping. This occurs when a printed solid object cools unevenly, leading to deformation in the final output.
Autodesk Fusion 360 combats this issue with advanced slicer software built into the platform, ensuring an even heat distribution and minimizing the risk of warping.
For those with experience using Blender, another popular 3D modeling software, transitioning to Autodesk Fusion 360 could be a breeze.
Both platforms share several features, though the latter’s user interface and extensive toolset cater well to 3D printing enthusiasts.
To sum it up, Autodesk Fusion 360 is an excellent choice for mastering advanced CAD skills in 3D printing due to its robust assembly tools, built-in slicer software, and compatibility with various modeling software like Blender.
With Autodesk Fusion 360, you’re one step closer to perfecting your 3D printing designs and prototypes.
Working with Materials in 3D Printing
3D printing opens up a world of possibilities in various industries, and the key to getting the most out of this technology is understanding the materials you’re working with.
Plastic is the most commonly used material in 3D printing, particularly thermoplastics like PLA and ABS. These materials come in the form of filament, which is fed into the extruder of the 3D printer.
The extruder heats the filament and pushes it through a nozzle, creating objects layer by layer. The movement and deposition of this material are controlled by numerical codes called G-code.
These codes are generated by slicing software, which takes your 3D CAD model and converts it into instructions for the printer.
In 3D printing, there are some essential factors to consider when working with materials. One such factor is infill – the internal structure of the printed object.
Infill helps determine the strength of the print while also saving material and decreasing print time. Common infill patterns include honeycomb and cubic lattice.
Another critical factor is the build plate. This is the surface on which the 3D-printed object is created. It’s essential to have an adequately leveled build plate to ensure the print layers adhere correctly and prevent it from warping.
The print bed temperature must also be calibrated for optimal results, as this can affect the adhesion and quality of your print.
When working with materials in 3D printing, it’s crucial to have a good understanding of the printer’s components as well.
The Z-axis is the vertical direction in which the print head moves up and away from the build plate. An accurate and smooth Z-axis motion is vital for producing high-quality prints.
Moreover, the type of 3D printer can also affect the choice of materials. Many printers use LCD or light-based technologies to cure resin materials, leading to different material properties and applications.
It’s essential to choose the suitable material for your specific project and printer to achieve the best possible results.
In conclusion, to effectively work with materials in 3D printing, you should be familiar with the characteristics of different materials like plastic, know-how components such as the extruder and build plate function, and understand the relevance of factors like infill, Z-axis movement, and printer type.
With this knowledge, you’ll be well-equipped to tackle any 3D printing project!
Transferring CAD Design to CNC
Transferring a CAD design to CNC involves a few key steps. First, you must ensure that your CAD file is adequately optimized and prepared for the CNC machine.
This may include checking the design for errors, providing proper tolerances and scale, and making necessary modifications to ensure a successful machining process.
After your CAD design is ready, it’s time to convert it into a CNC-compatible format. The most commonly used CAD software offers the option to export your design as an STL, DXF, or G-code file.
These files are specifically designed for CNC machining and 3D printing processes. You can refer to this article for more details on converting your CAD file into a suitable format for CNC.
Next, you’ll need to choose a suitable CNC machine and set up the appropriate settings for your design. This may include selecting the right cutting tools, material, and operation parameters specific to your design.
Different CNC machines may have unique capabilities, so it’s essential to understand which machine will work best for your project.
Once your CNC machine has been set up, it’s time to run your design through the machine. This includes loading your CNC-compatible file into the machine’s software, choosing the correct settings, and starting the cutting process.
Keep an eye on the process to ensure everything runs smoothly, and make adjustments as needed.
Transferring your CAD design to a CNC machine involves careful planning, proper design optimization, and selecting the correct settings and machine for the job.
Following these steps can achieve a smooth and successful CNC machining process for your 3D design.
CAD for Absolute Beginners

Getting started with CAD for 3D printing might seem daunting for beginners, but the process can be enjoyable and straightforward with the right software and resources.
To make the learning curve easier, it’s essential to choose CAD software tailored to novices, such as FreeCAD and Wings 3D, which offer simple interfaces and user-friendly tools.
When beginning your CAD journey, having a PC with adequate processing power is crucial to handle the software efficiently.
Artists new to CAD should start by familiarizing themselves with basic design concepts, such as dimensions, sketching, and measurements.
This foundation will help them create and manipulate 3D models in a CAD program.
In the early stages of CAD learning, creating a simple 3D sketch is a great way to understand dimensions and measurements.
As the artist works on the sketch, they can experiment with aligning different elements and adjusting the dimensions to fit their design goals.
CAD software allows users to examine their models from various angles, enabling them to ensure that all parts are aligned correctly before moving on to the next step.
Once satisfied with the design, the next essential step is to export the 3D model for 3D printing. Most CAD software supports standard file formats, such as STL or OBJ, which are widely accepted by both consumer and professional 3D printers.
The exported files can then be imported into slicer software, which prepares the model for 3D printing by generating the required layers and toolpaths.
By focusing on these core concepts and working with beginner-friendly CAD software, absolute beginners can quickly gain confidence and skills in CAD for 3D printing.
As they progress, exploring more advanced features and techniques will enable them to create increasingly complex and detailed designs for their 3D printing projects.
Learning Pathways for Engineers

Engineers looking to learn CAD for 3D printing have various options at their disposal. One such option is Autodesk Learning Pathways, which offers on-demand courses for learners to improve their skills at their own pace.
These courses are designed to teach, practice, and test numerous skills necessary for CAD and 3D printing, making it an ideal choice for engineers.
The coursework consists of both skill-builder courses and certification prep courses, catering to engineers of all levels. Beginners can start with introductory lessons and gradually advance to more complex topics.
Quizzes are integrated throughout the learning material to help engineers assess their progress and reinforce their understanding of critical concepts.
Another advantage of Autodesk Learning Pathways lies in its flexibility. As all courses are available online, engineers can access the material anytime, ensuring that their learning fits comfortably within their schedules.
Additionally, the platform offers unlimited course access, so engineers can revisit any topic whenever they need a refresher.
For engineers who prefer a more hands-on approach, local workshops and tutorials can provide invaluable experience utilizing CAD for 3D printing.
These sessions often include guided practice on real-world projects, allowing participants to apply their knowledge and problem-solve alongside peers and experienced instructors.
In summary, various learning pathways are available to engineers seeking to expand their knowledge of CAD for 3D printing.
Engineers can develop their skills and become proficient in this essential technology by choosing a suitable approach, such as Autodesk Learning Pathways or hands-on workshops.
How to Learn CAD for 3D Printing: Top Takeaways
To begin your journey in learning CAD for 3D printing, it is essential to choose the right software.
Some popular CAD programs for 3D printing include Tinkercad, Fusion 360, Blender, and FreeCAD. Each software has its unique features and learning curves, so take the time to explore and find the one that best meets your needs.
Once you’ve selected your software, various resources are available online to help you master your chosen program.
Consider taking advantage of online courses and tutorials that cater to learners of varying skill levels.
These courses often provide step-by-step instructions, hands-on practice, and valuable tips to help you learn efficiently.
As with any new skill, practice is key. Set aside time each day or week to work on small CAD projects and gradually increase the complexity of your designs.
This will allow you to test your skills, gain confidence, and find areas for improvement.
Another effective learning method is participating in online CAD communities and forums.
Engaging with others who share your interest in 3D printing allows you to ask questions, share your progress, and learn from the experiences of others.
While learning CAD for 3D printing can sometimes feel overwhelming, remember to persevere and keep a positive mindset.
Remain patient, practice regularly, and seek resources and support to maximize your learning experience.