3D printing has revolutionized the way we create and manufacture objects, enabling intricate, complex designs to be brought to life with ease.
One crucial aspect of this process is the construction of supports to ensure that your 3D-printed models remain stable during the printing process.
These supports play a vital role in the success of your print, especially when dealing with intricate designs, overhangs, and bridges.
Table of Contents

Understanding how to build supports for 3D printing is essential for anyone venturing into this fascinating world of additive manufacturing.
Properly designed supports can mean the difference between a successful print and a disappointing outcome. In this article, we’ll explore how to set up and optimize supports to ensure your 3D-printed creations look their best.
To get started, you’ll need to familiarize yourself with your 3D printing software, such as Cura or Meshmixer, and understand the various settings and options available.
This will enable you to confidently tailor your supports to meet the specific needs of your 3D model, whether you’re working on a simple structure or a more complex geometry.
With the proper knowledge and practice, you’ll soon be able to produce consistently impressive 3D prints using well-designed supports.
Exploring Types of 3D Printing Supports
Understanding Overhangs and Bridges
When 3D printing, you may encounter parts of your model that are unsupported due to their complex geometry or angle, which are known as overhangs and bridges.
Overhangs are portions of a model that extend outward beyond an angle of 45°, defying gravity and posing challenges during the printing process.
Bridges, however, are horizontal sections that span between two points without any intermediate support.
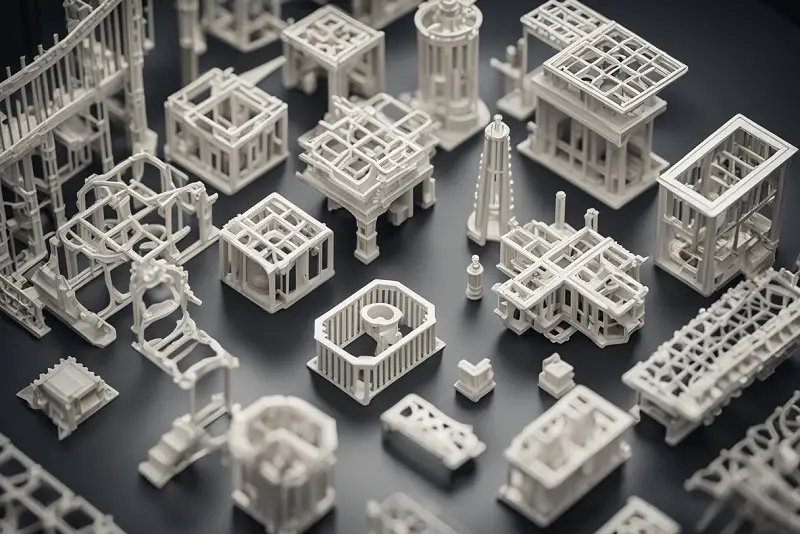
In order to successfully print these complex features, it’s crucial to use support structures. Different types of supports include normal supports, tree supports, dissolvable supports, and breakaway supports.
Normal supports have a simple, linear structure.
In contrast, tree supports have a branching structure that’s thicker at the base and thinner at the top, providing better stability during printing and consuming less filament.
Dissolvable supports are made from materials that dissolve in water or chemicals, easing removal.
Breakaway supports, usually made from the same material as the printed part, are designed to be easily removed by breaking them away after the print is completed.
Role of Slicers in Support Generation
Slicers play a crucial role in generating support structures for 3D prints.
These software tools, such as Ultimaker Cura and PrusaSlicer, slice the 3D model into layers and develop the necessary code for the printer to deposit material accurately.
Slicers are used to determine the type, density, and configuration of support structures needed to print a model successfully.
When using slicing software, you can often choose between different types of supports, including custom supports that you manually place within the model.
This enables you to optimize the support placement for your specific model, ensuring that overhangs and bridges are adequately supported while using the least amount of material and printing time possible.
In conclusion, understanding the types of 3D printing supports and the role slicers play in support generation is essential for successful prints with complex geometry.
Experimenting with different support types and slicer settings will produce better-quality prints while minimizing material usage.
Materials in 3D Printing Supports
When it comes to 3D printing supports, choosing a suitable material is crucial for obtaining a successful and structurally sound printed model.
Common support materials include PLA, ABS, and specialized water-soluble filaments. Each material serves a unique purpose and has its advantages.
PLA (Polylactic Acid) is a popular choice for 3D printing supports as it is biodegradable and easy to work with. PLA offers strong adhesion properties, making it suitable for a variety of printing applications.
Moreover, PLA has a lower melting temperature than other materials, reducing the risk of warping during the printing process.
ABS (Acrylonitrile Butadiene Styrene) is another widely used material in support structures. It is known for its toughness and durability, which can be crucial for complex prints with significant overhangs.
However, ABS tends to shrink as it cools, potentially creating challenges when removing supports. Also, it requires higher printing temperatures and a heated build platform, making it less user-friendly than PLA.
Finally, water-soluble filaments such as PVA (Polyvinyl Alcohol) and BVOH (Butenediol Vinyl Alcohol Copolymer) offer unique benefits for support.
These materials can be dissolved in water, making support removal effortless and reducing the risk of damaging delicate parts.
Water-soluble filaments are often used for intricate or hard-to-reach areas where traditional supports might be challenging to remove.
Selecting the appropriate material for your 3D printing supports will ultimately depend on your specific printing project and its requirements.
Each material presents unique advantages, and a thorough understanding of their properties will help you choose the best option for your print.
Scanning Support Settings

When embarking on a 3D printing project, it’s crucial to understand and optimize the various support settings. This will ensure a successful print with accurate details and minimal post-processing work required.
One vital aspect of support settings is the overhang angle. This parameter determines the angle at which support structures are required to support the 3D-printed object.
Generally, angles greater than 45 degrees need support to avoid drooping or sagging during the print process.
It is essential to find the best balance for your model, as a smaller overhang angle may result in unnecessary supports, while a larger angle could lead to printing defects.
Another critical parameter to consider is the support density. This refers to the amount of infill used within the support structure.
A higher support density will provide more substantial support but may be more challenging to remove after the print.
Conversely, a lower support density may result in weaker support structures, potentially leading to print failure. It’s crucial to strike a balance depending on your model’s requirements.
The z distance is the space between the support structure and the 3D-printed object.
Ideally, the z distance should be enough to prevent the support from fusing to the model but not too large to compromise the support’s effectiveness.
Factors to consider when selecting the z distance include the material being used and the intricacy of the model.
Additionally, the support overhang angle plays a crucial role in determining the placement of support structures along the model’s overhangs.
This parameter is similar to the overhang angle and will help identify the appropriate distribution of supports for a successful print.
Finally, the horizontal offset setting adjusts how far the support structures are placed from the model horizontally.
This can help reduce the likelihood of the support structures fusing to the model during the print process, making them easier to remove post-print.
By carefully considering these parameters and adjusting them to suit your 3D model, you can improve print reliability, reduce the need for excess supports, and ultimately create a better final product.
Test and experiment with your 3D printer to find the ideal settings for your specific models and materials.
Implementing Support Placement and Removal
When working with 3D printers, support placement plays a crucial role in ensuring the success of your 3D prints.
First, import your STL file into a slicing software like Cura, which helps locate overhangs and islands. Enable support generation and adjust the settings to best suit your model.
Some slicers offer options only to generate support where needed, which can save material and simplify post-processing.
You can also use support blockers to prevent support generation in specific areas, giving you more control over your 3D print.
Materials like PLA and ABS usually require support to print intricate shapes and angles. Positioning the support structures correctly on the build plate can prevent print failure and ensure a clean finish.
In some cases, using a dual-extruder 3D printer can simplify support removal by designating one extruder for the support structures.
Once your 3D print is finished, post-processing plays a significant role in its final appearance. Carefully remove the support structures from your 3D print using pliers or a similar tool.
Ensure you don’t damage delicate parts of the print during this process. The surface finish might have rough edges where the supports were attached, but this can be smoothed using sandpaper or other tools designed for refining 3D-printed objects.
Experimenting with different support settings in your slicer can make support placement and removal more straightforward.
As you refine your technique, you will find the best methods and settings for your specific 3D printer, resulting in cleaner and more successful 3D prints.
How to Build Supports for 3D Printing: A Recap
Creating support structures for 3D printing is vital for ensuring the success of complex prints.
They come in different types, such as overhangs, bridges, and complex geometries, which are essential for holding up delicate sections during printing.
To begin building supports, import your model into a slicing software like Cura. Enable supports and edit your settings, and if needed, install a custom supports plugin.
Inspect the model for any problematic areas, like islands or overhangs, that may require additional support structures.
When placing supports, analyze your model to determine the ideal positioning.
Customizable support settings allow you to define parameters such as density, angle, and contact distance, ensuring the supports are not overly dense or prone to breaking.
Once the support structures are correctly set up, and your print is finished, carefully remove the supports. This step requires precision to avoid damaging the details of your 3D-printed objects.
Depending on the support material used, removal techniques may vary.
By following these guidelines, you’ll be able to create well-designed support structures that contribute to smooth and successful 3D prints.


